SimpleGen — новый продукт для генерации решений на платформе SimpleOne с помощью AI. В этой статье рассмотрим, как начать работу с SimpleGen: что поставить на рабочую машину, как подготовить репозиторий, настроить доступ к SimpleOne, а также выполнить свою первую задачу.
Подготовка
1) Что потребуется 
Экземпляр (стенд) платформы SimpleOne
Для работы нужен любой экземпляр платформы SimpleOne. Подойдёт любой вид экземпляра (dev/test/stage/личный стенд и т.п.) и тип размещения (облако/внутренняя сеть) — важно лишь, чтобы у вас были:
-
URL-стенда
-
учётные данные администратора или API-key
Устанавливать SimpleGen на стенд не требуется: он подключается к стенду по URL и использует ваши креды/ключ.
Инструменты на рабочей машине 
-
Node.js + npm
-
Git для вашей ОС (для git init, коммитов и работы с GitLab)
-
Cursor (имеет бесплатный тариф с ограниченным числом запросов)
2) Установка SimpleGen 
Откройте обычный терминал вашей ОС, где доступны node/npm/git и выполните «Глобальную установку»: глобальная установка позволяет сделать команду simplegen доступной в терминале из любой директории. Для этого используйте флаг -g:
npm install -g @simplegen/simplegen[1]

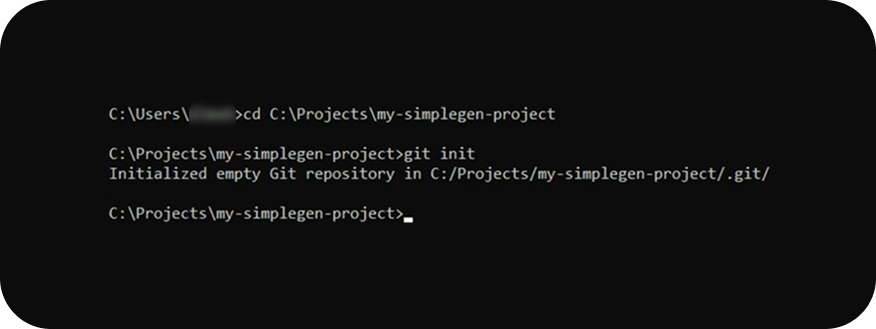
3) Подготовка Git-репозитория (инициализация репозитория) 
Если папка проекта ещё не является git-репозиторием, то в терминале выполните:
git init
Ошибка вида “git не является внутренней или внешней командой…“
Важно! Если при выполнении команды вы видите сообщение вида “git не является внутренней или внешней командой…”, значит Git не установлен или не добавлен в PATH. Установите Git подходящий для вашей ОС и затем проверьте git --version.
4) Настройка доступа к SimpleOne 
SimpleGen использует переменные окружения. В корне проекта (репозитория) в файле .env должны быть заданы:
-
SIMPLEONE_URL
-
и либо SIMPLEONE_API_KEY, либо SIMPLEONE_LOGIN + SIMPLEONE_PASSWORD
Например:
SIMPLEONE_URL=http://simple.test
SIMPLEONE_LOGIN=admin
SIMPLEONE_PASSWORD=123456
Откуда берутся переменные (по приоритету):
-
переменные окружения процесса (SIMPLEONE_*)
-
.env в корне репозитория
-
~/.simplegen/.env
5) Первичная инициализация SimpleGen-проекта 
Если вам необходимо инициализировать пустой репозиторий (продукт уже создан на экземпляре, но не клонирован в папку репозитория), то запустите команду в папке проекта:
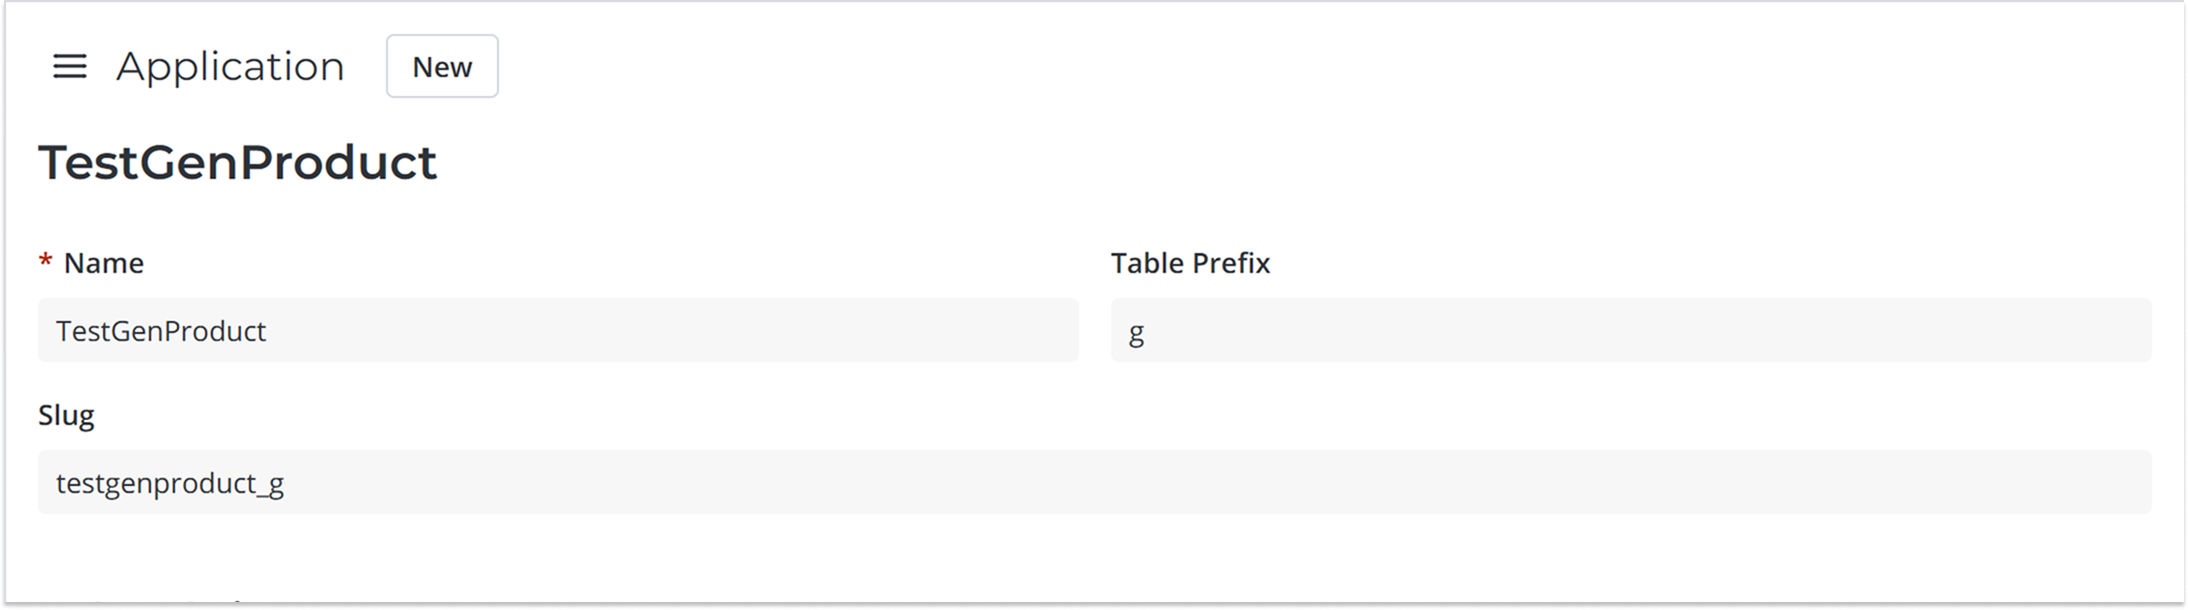
simplegen init Название_приложения
Название приложения должно точно совпадать со значением поля name в таблице Applications на стенде.
Эта команда выгрузит со стенда записи вашего приложения, а также обязательных приложений (Simple Application и Platform).

Ошибка вида: “simplegen fetch failed”
Важно! Если при выполнении команд вы видите сообщение вида: “[simplegen] fetch failed”, значит невозможно обратиться к вашему экземпляру. Проверьте его доступность для внешней сети.
Если репозиторий проекта не пустой, то для последующего обновления версий используйте команду /simplegen.init
Нюансы:
-
Выгрузка “тяжёлых” продуктов может занять до ~10 минут.
-
Команду
simplegen init Название_приложениянеобходимо выполнить 1 раз при первичной настройке, если репозиторий проекта пустой.
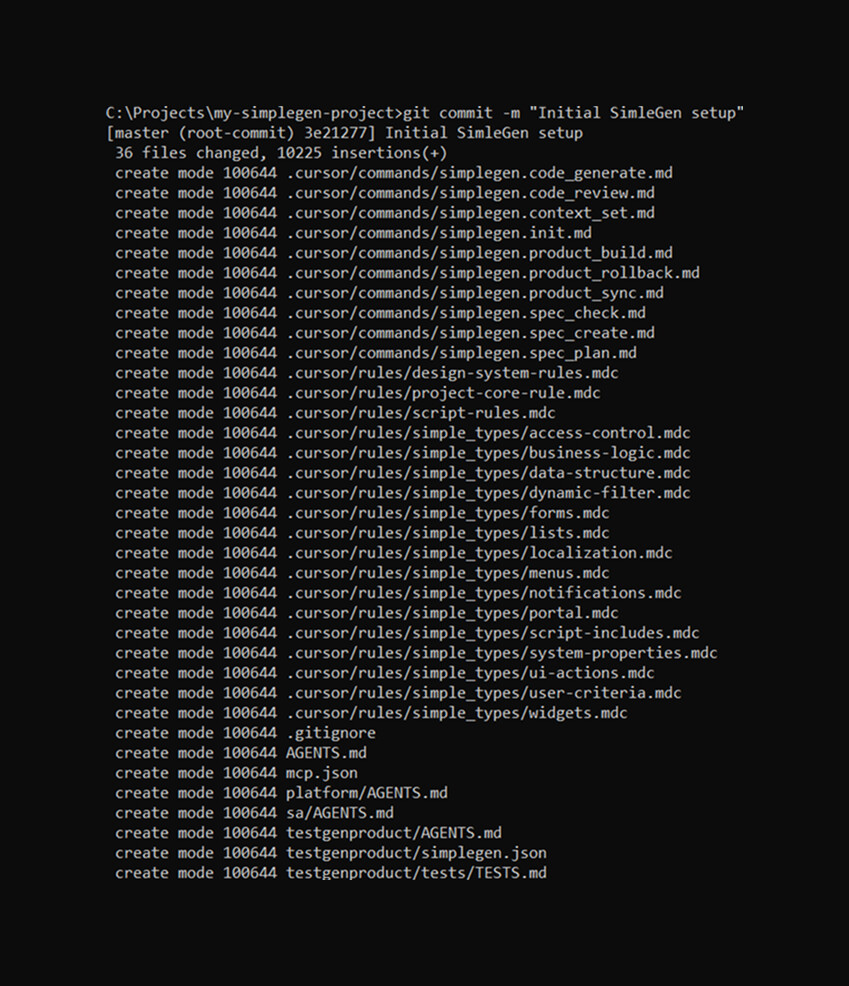
6) Зафиксируйте стартовое состояние 
git add .
git commit -m “Initial SimpleGen setup”
Ошибка вида “Author identity unknown”
Важно! Если при выполнении команд вы видите сообщение вида: “Author identity unknown”, значит необходимо задать ваш Git-профиль. Для этого добавьте 2 команды:
git config --global user.name “имя_вашего_пользователя”
git config --global user.email “почта_вашего_аккаунта”
Для чего необходима фиксация стартового состояния?
-
Получить “точку отсчёта” после инициализации
Коммит фиксирует корректное базовое состояние проекта сразу после настройки. -
Упростить контроль изменений и разбор проблем
Дальше любые действия (генерация, правки, синхронизация) будут давать прозрачность изменений относительно этого коммита: что и где именно изменилось. Это особенно полезно, когда нужно понять, что привнесла генерация или обновление. -
Безопасно откатываться
Если после следующих шагов что-то пошло не так, можно быстро вернуться к “зафиксированному” состоянию. -
Удобство командной работы (GitLab)
Когда базовое состояние закоммичено, у всей команды одинаковая стартовая база: проще ревьюить и сравнивать изменения.
Работа над задачей с Cursor (как запускать команды SimpleGen)
Cursor — это редактор, в котором команды SimpleGen запускаются через чат в формате slash-команд (через меню).
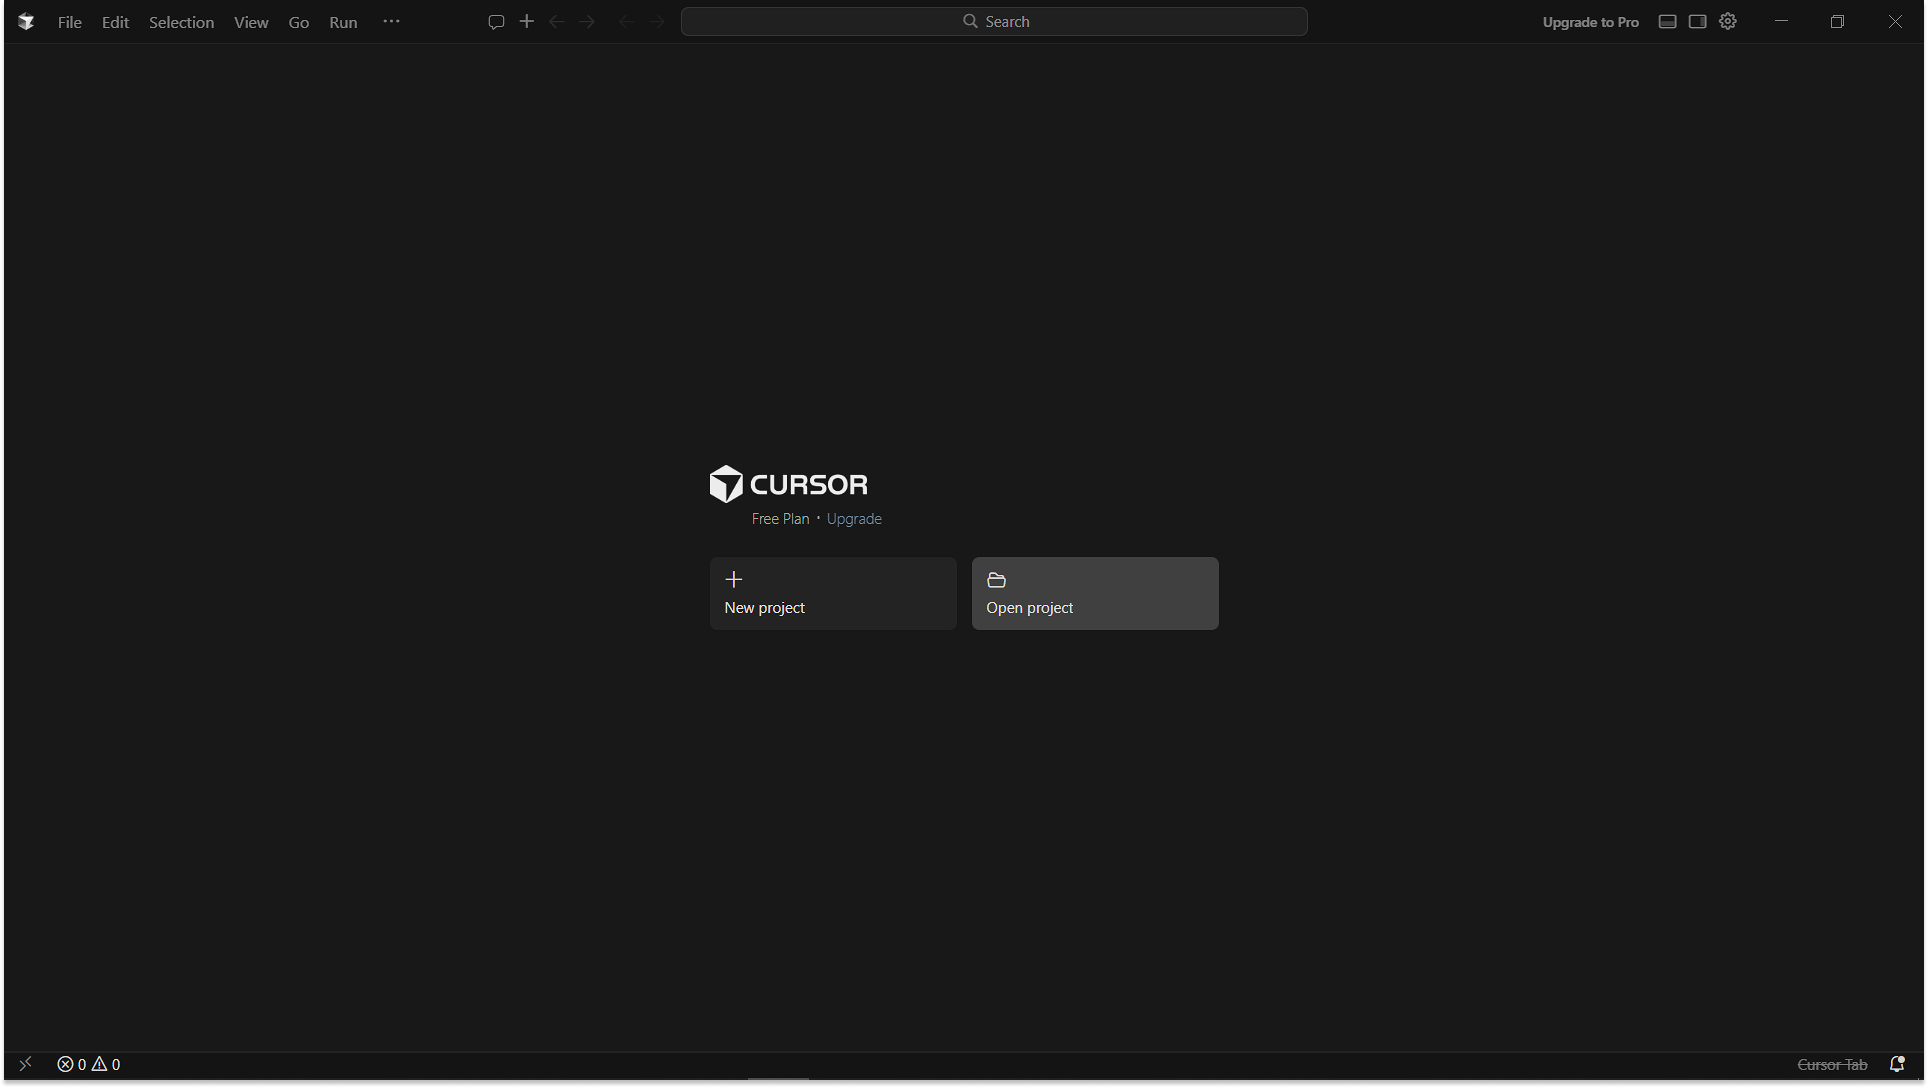
1) Откройте проект в Cursor
SimpleGen ориентируется на структуру проекта и файлы репозитория, поэтому проект должен быть открыт целиком. Для этого нажмите на кнопку Open project и выберите корень репозитория (папку, где находятся .env, platform/, sa/ и т.п.).
Ниже — типовой процесс работы над задачей в SimpleGen в Cursor: от постановки до деплоя на стенд. Команды запускаются в чате Cursor через меню
/(как slash-команды), а не как обычный текст.
2) Создайте спецификацию задачи
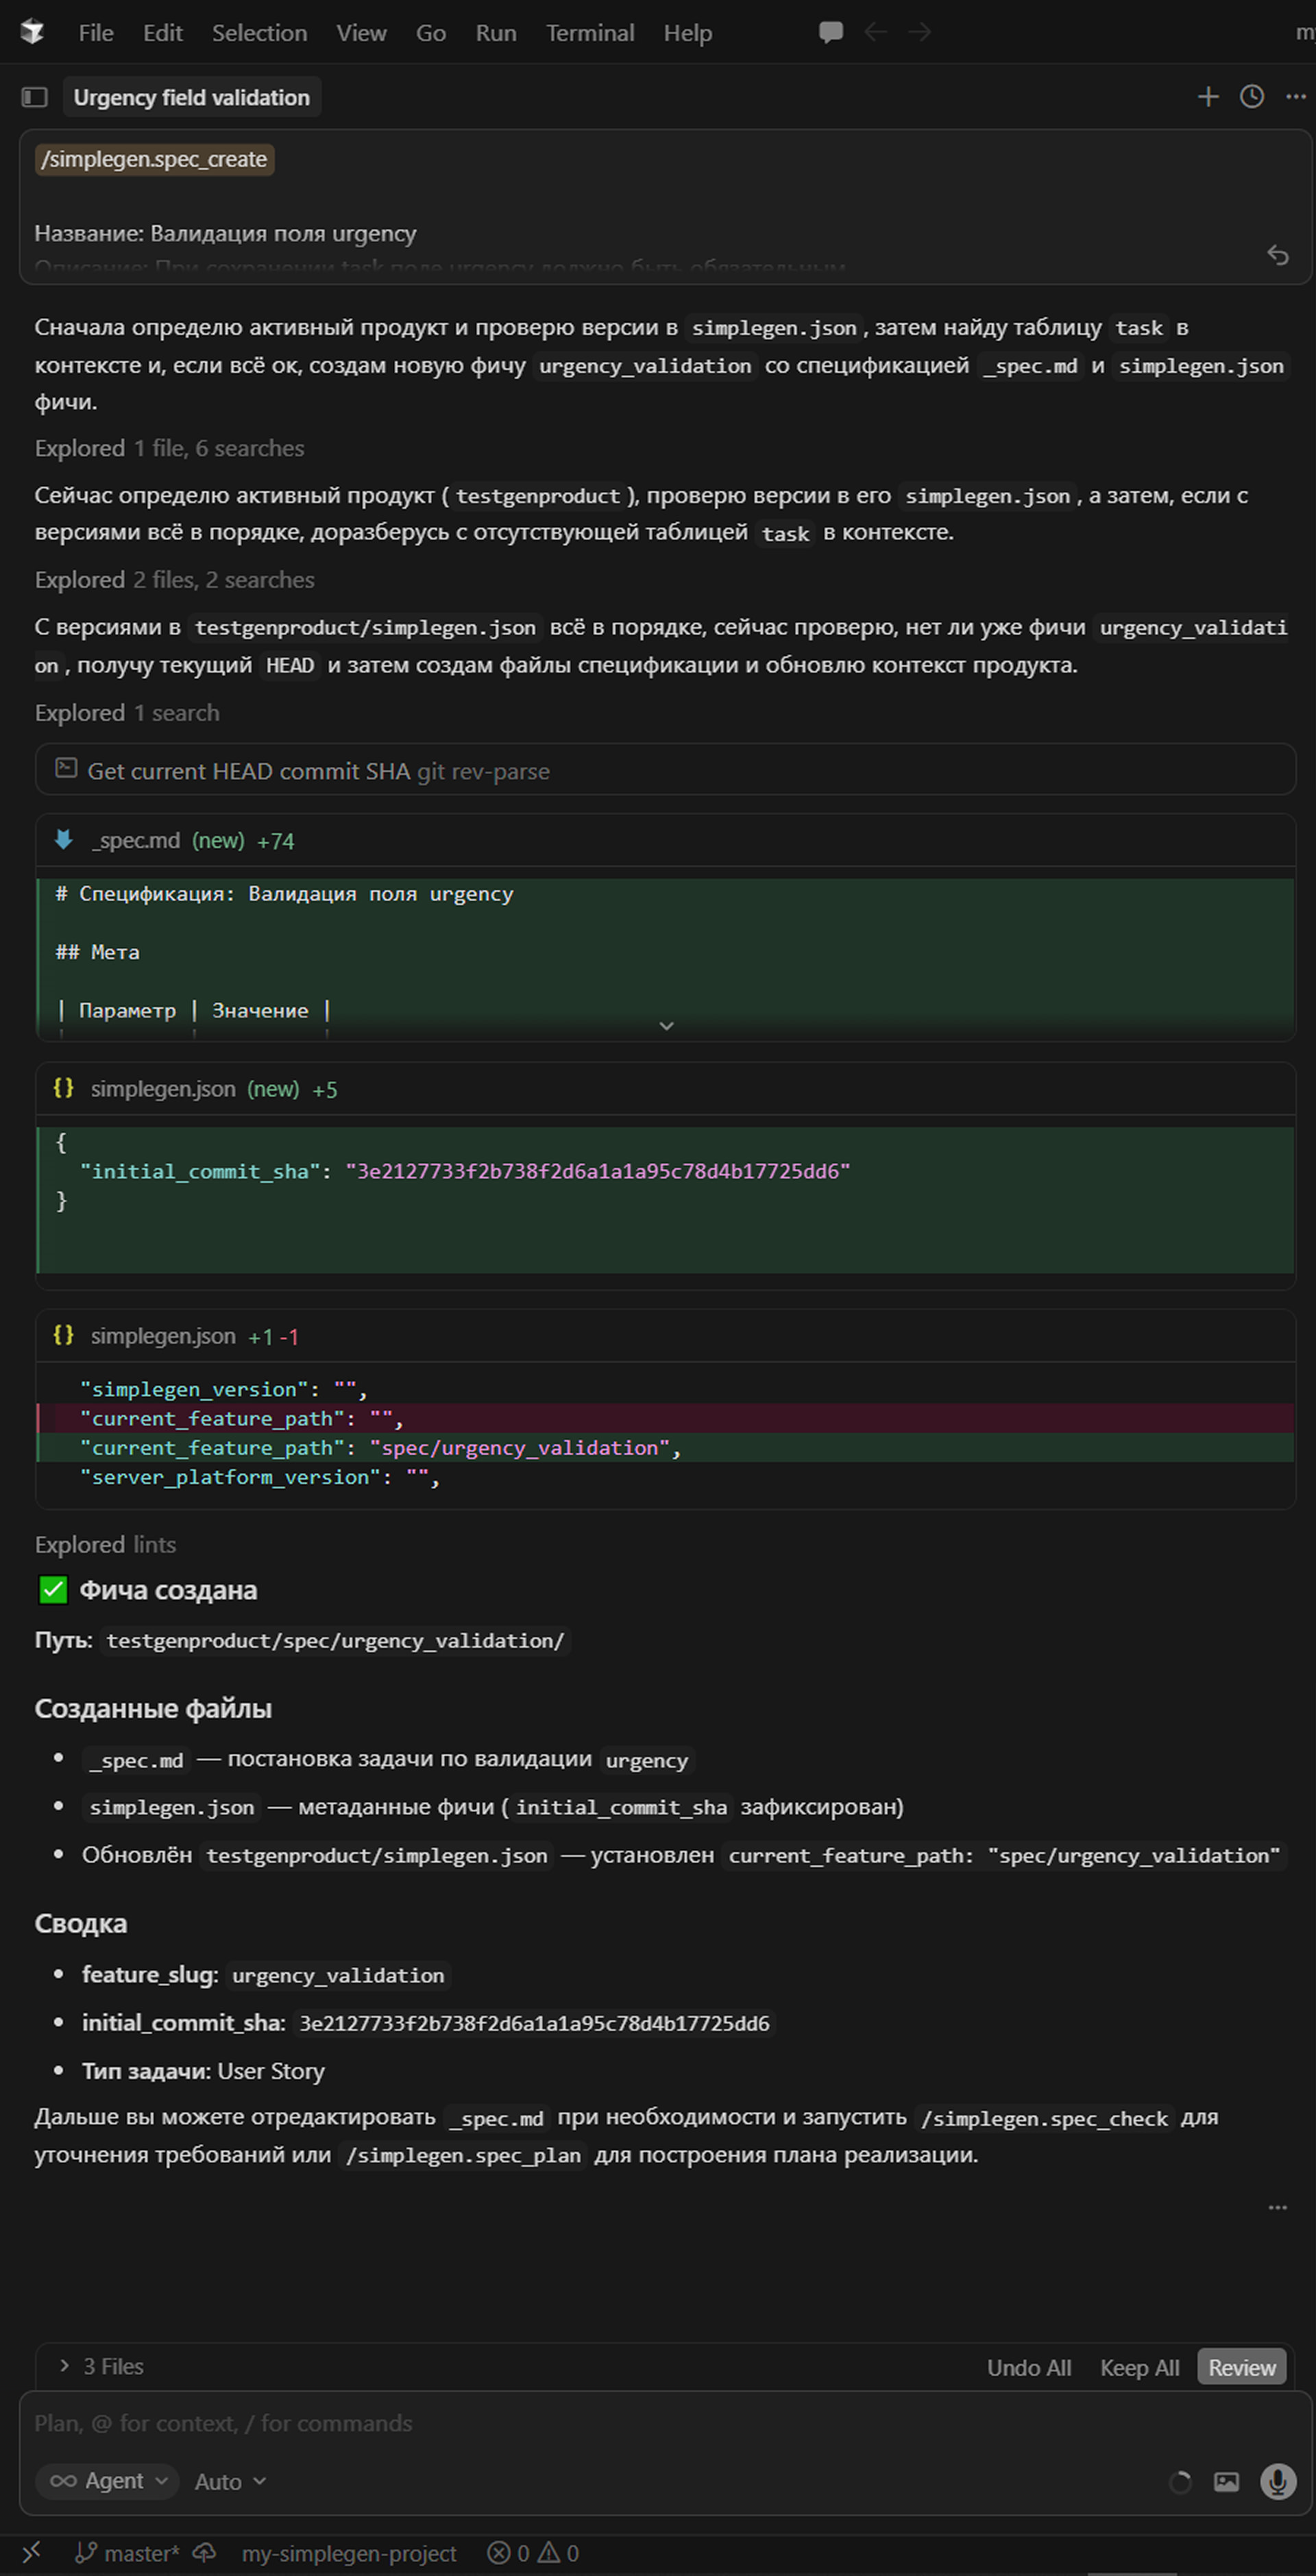
В чате Cursor выполните команду создания спецификации:/simplegen.spec_create
Вместе с командой введите: краткое описание задачи + критерии приёмки.
Долго висит “Reconnecting…” в статусе запроса Cursor
Долго висит “Reconnecting…” в статусе запроса Cursor: это проблема соединения Cursor с экземпляром (сеть/VPN). Сначала восстановите соединение и только потом запускайте SimpleGen-команды.
Разберём пример:
Название: Валидация поля urgency
Описание: При сохранении task поле urgency должно быть обязательным
Критерии приёмки:
- При пустом urgency показывается ошибка
- Запись не сохраняется без urgency
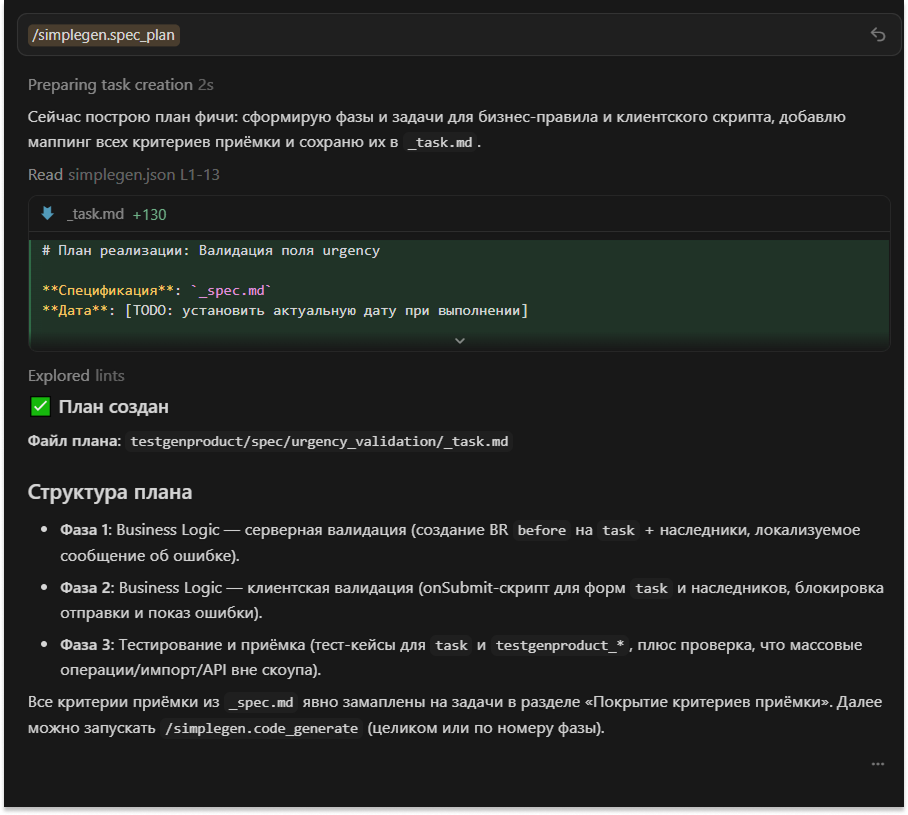
3) Сформируйте план реализации
/simplegen.spec_plan — разбивает задачу на этапы и создаёт план работ в _task.md
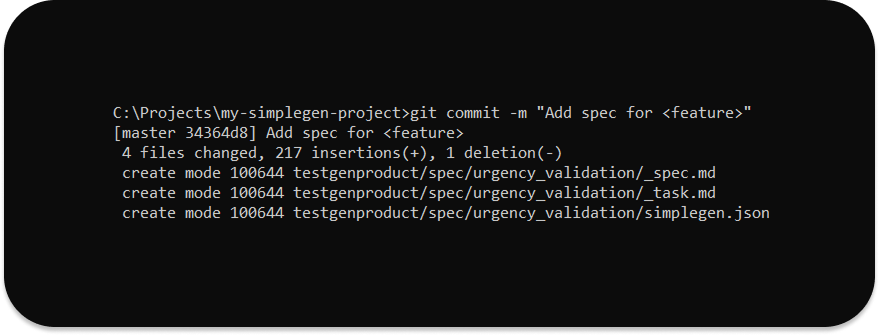
После того как спецификация и план вас устраивают, рекомендуем зафиксировать их в git:
git add .
git commit -m "Add spec for <feature>"
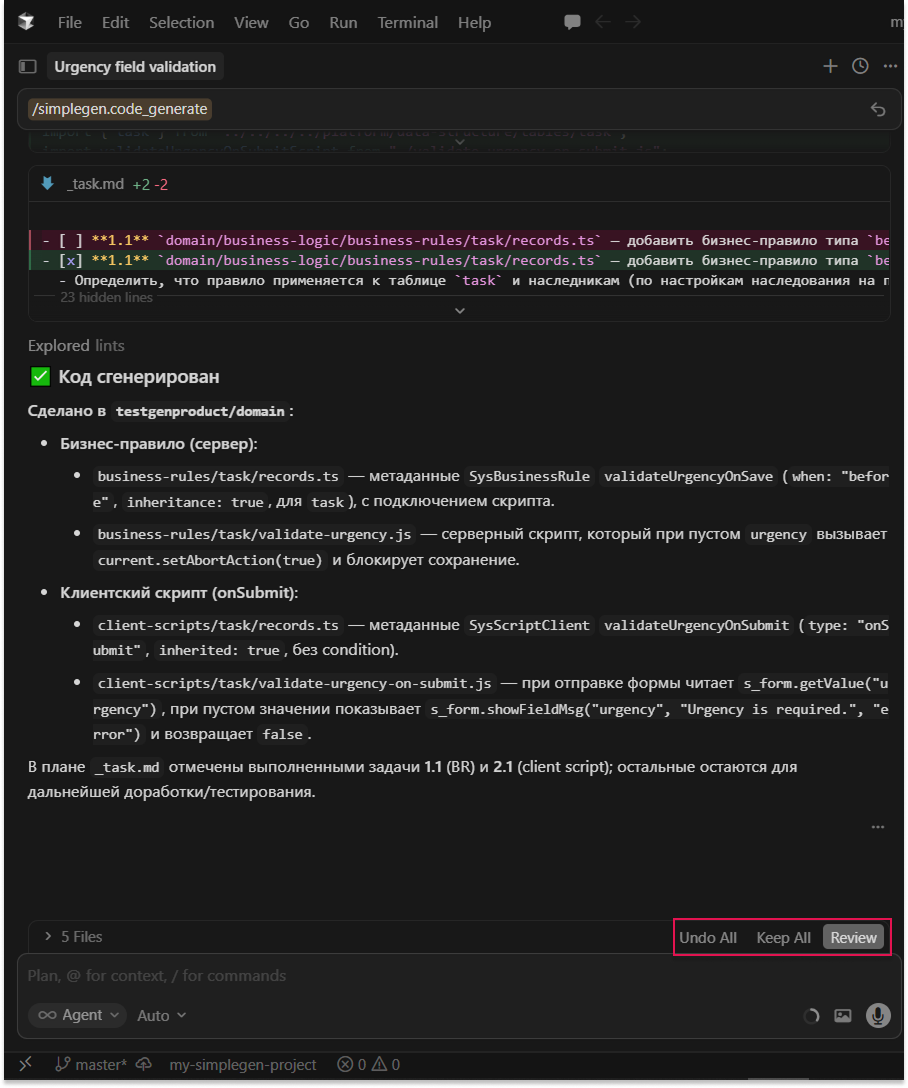
4) Сгенерируйте изменения (код/конфигурацию)
/simplegen.code_generate — генерирует изменения по спецификации и плану текущей фичи.
После генерации:
- проверьте изменения в git diff/Changes в редакторе,
- при необходимости скорректируйте спецификацию/план и повторите генерацию (итеративно),
- Keep All — принять все изменения.
5) Закоммитьте результат
Когда изменения вас устраивают:
git add .
git commit -m "Implement <feature>"
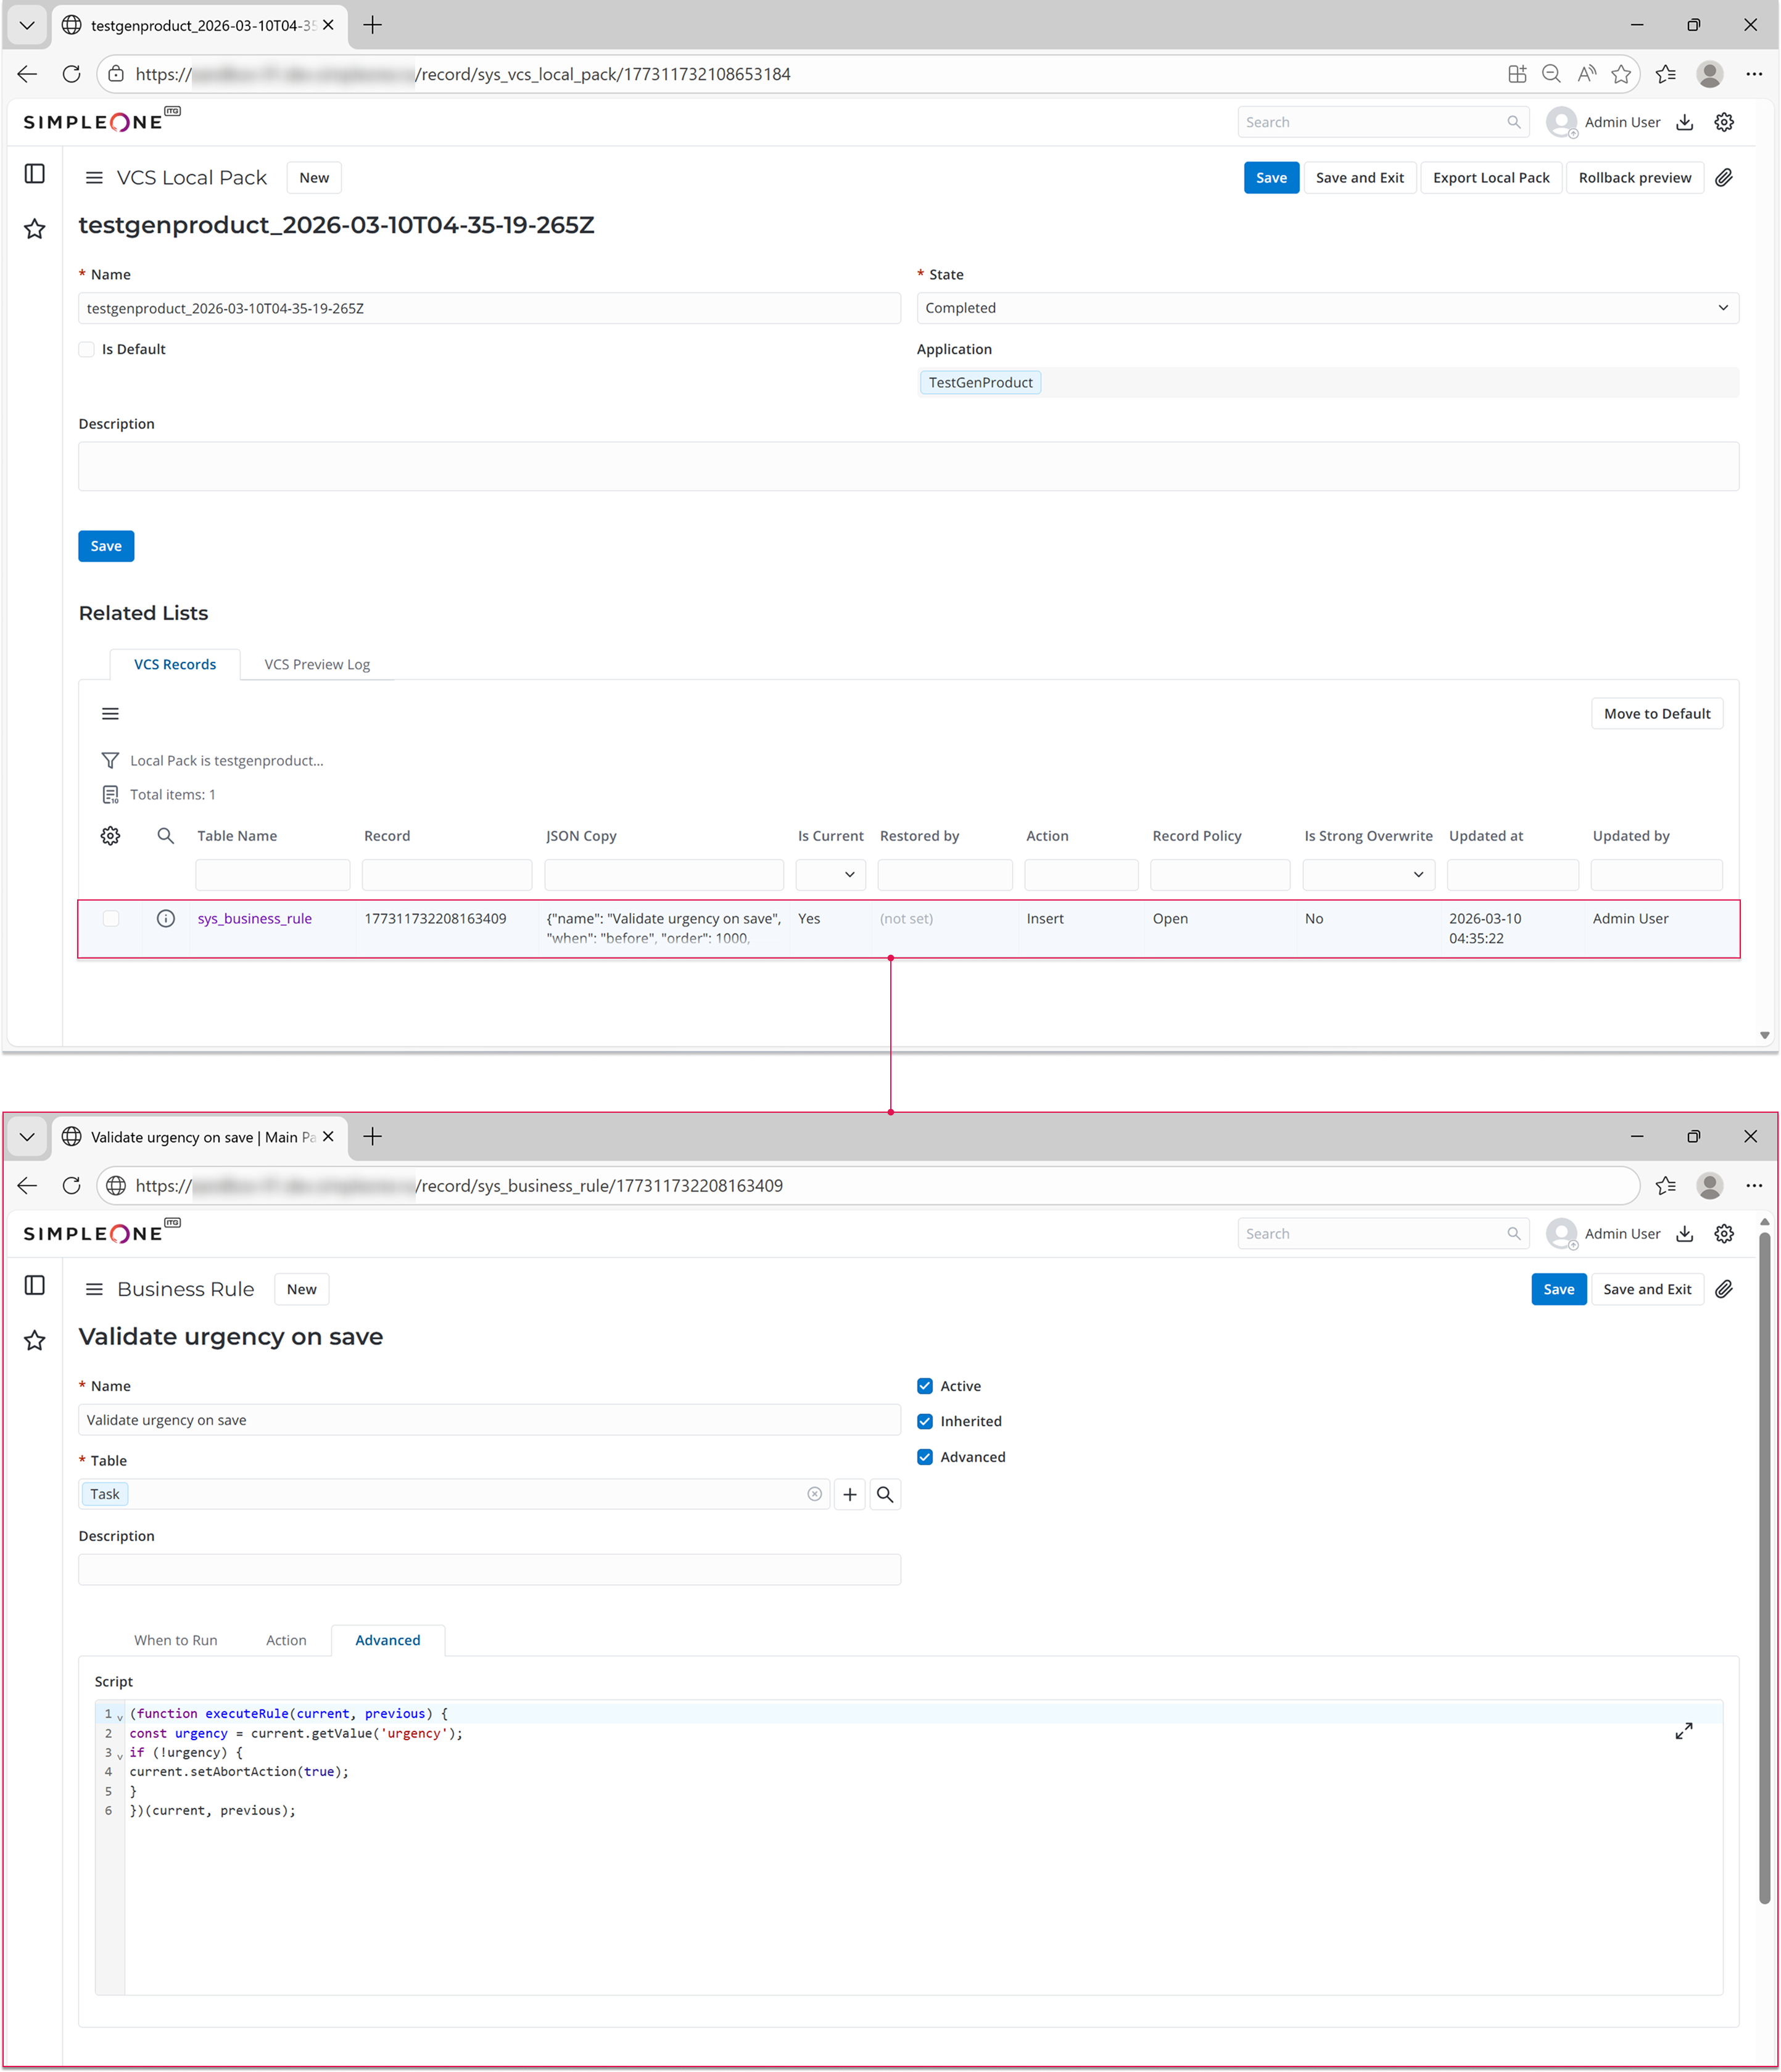
6) Соберите и задеплойте на стенд SimpleOne
/simplegen.product_build — собирает SOP и разворачивает изменения на стенде (статус деплоя выводится в консоль)
Итог 
Теперь у вас есть:
-
установленный SimpleGen
-
локальный репозиторий (git)
-
настроенный доступ к вашему экземпляру SimpleOne (по URL + креды/ключ)
-
первая выполненная задача

В следующих статьях рассмотрим, как подключить Figma и работать над продвинутыми задачами проекта. Если появились вопросы по началу работы с SimpleGen или идеи для новых статей, с радостью ждём в комментариях!
Инструментарий для генерации кода платформы SimpleOne с помощью AI: https://www.npmjs.com/package/@simplegen/simplegen
Подробнее можно узнать тут: https://www.npmjs.com/package/@simplegen/simplegen ↩︎